For those unfamiliar with it, Burda is a monthly German dress pattern magazine that has over 40 patterns in it which you can trace out and make. I don't usually buy it-to date I've only bought three issues. It's about $15.90 per mag and is good value for money if you make at least one garment from it every month. It has pictures of models wearing the designs, a page with line drawings, and an insert of patterns in various colours which you trace out. I like looking at the line drawings more than the pictures for the design ideas it inspires me to.
Of the 6 mags I borrowed, the June 09 issue had an interesting dress.
[caption id="" align="alignnone" width="440" caption="Burda 06/10"]
 [/caption]
Pleat front jersey dress 102 Burda Jun 09
[caption id="" align="alignnone" width="224" caption="101 Burda 06/09 Pleat Front Dress"]
 [/caption]
This is a clearer line drawing of it.
[caption id="" align="alignnone" width="400" caption="102 Line Drawing"]
 [/caption]
I love the sunburst pleats and the pretty folds on the front. I formed an idea of a white dress with a black lace belt in this design and couldn't wait to get to it.
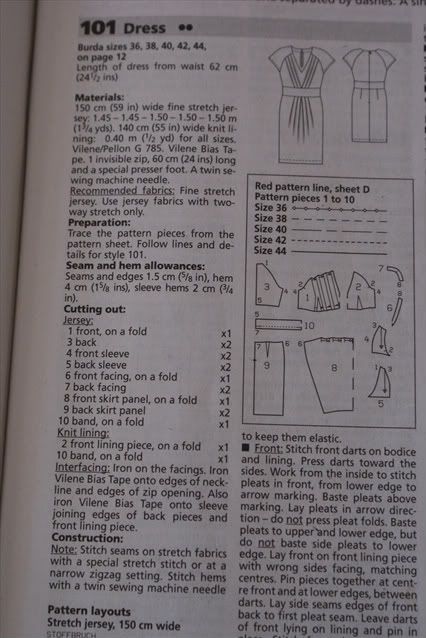
This is the instruction sheet in the magazine.
[caption id="" align="alignnone" width="426" caption="Instruction sheet"]
 [/caption]
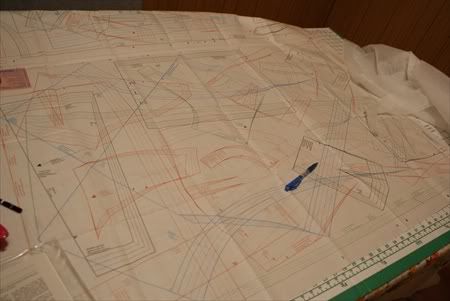
This is the pattern sheet. Each sheet is labelled alphabetically with patterns pieces printed on it. One sheet may have several garment patterns on it, and the patterns for different garments are differentiated with a different colour.
[caption id="" align="alignnone" width="450" caption="Pattern sheet"]
 [/caption]
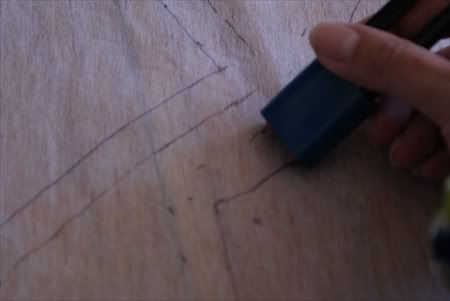
I trace out my pattern with sew-in interfacing, which is see-through and cheap. The Burda patterns do not have seam allowances added on to it, so here I am tracing around the patterns with a tracing tool-
[caption id="" align="alignnone" width="450" caption="Double pencils with a 5/8-inch spacer"]
 [/caption]
-which I got at Lincraft.
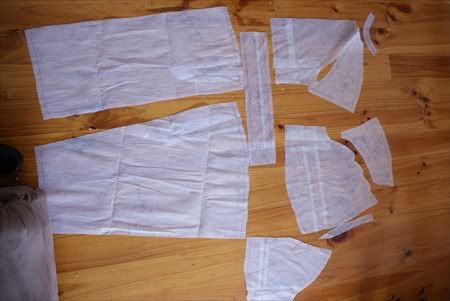
I traced a size 38 all over, but I was actually a size 42 at the waist, and 40 at the hips. I was too lazy to grade up or down according the markings-it was hard to see and too tedious. I figured that since this is a stretch fabric, I'll just pin fit the sides later. Also, the patterns were drafted for an "average" person-but who is? I'm very short waisted, so you'll see in my pattern pieces below I've made a length adjustment by shortening it by 2cms.
[caption id="" align="alignnone" width="450" caption="Pattern pieces cut and altered."]
 [/caption]
There are no construction photos-it was very quick to put together. The whole thing was sewn on my overlocker. The only thing that took some time was the front pleats.
The instructions said to baste the pleats together, and sew it onto the front lining piece and treat as one, and not to press the pleats. I was too lazy to baste and just sewed the pleats on permanently and pressed it anyway. But the effect aren't the soft folds as in the picture, which I do regret not following.
The instructions for the dress was for a zipper to be installed in the back. However, instead of cutting 2 back pieces, I cut it on the fold, so I decided to put an invisible zipper in the side seam.
One thing I found was that despite choosing the size 38, the whole dress was huge on me. I had to remove 2 inches on each side seam from top to bottom.
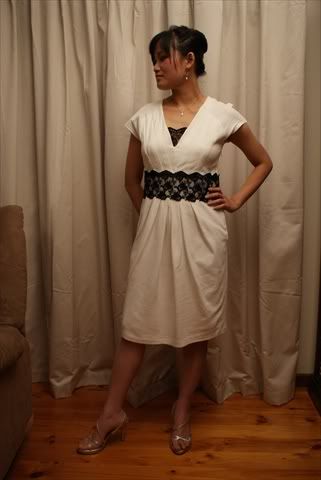
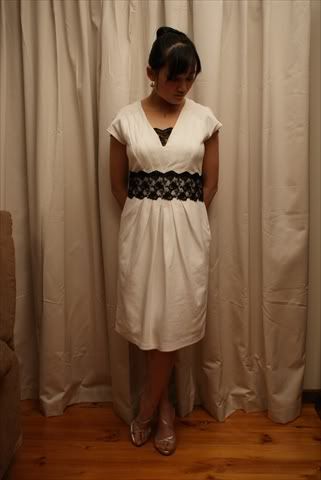
This is my finished dress.
[caption id="" align="alignnone" width="321" caption="Sunburst Pleated Dress"]
 [/caption]
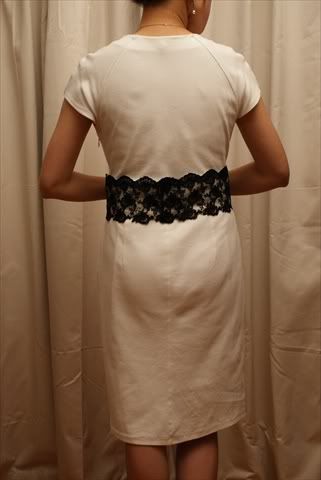
[caption id="" align="alignnone" width="321" caption="Back view"]
 [/caption]
The lace belt is removable and this is what it looks like without it.
[caption id="" align="alignnone" width="301" caption="Dress plain."]
 [/caption]
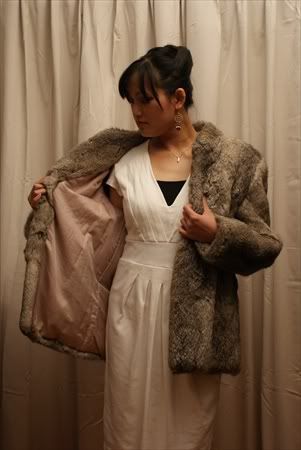
I wanted to be able to wear it casually, as well as to more dressy functions.
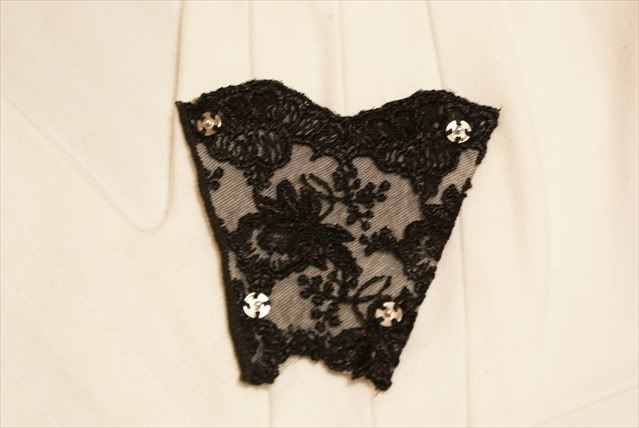
It didn't look so when the model wore it, but the neckline plunged too low for me. So I made a removable lace modesty panel.
[caption id="" align="alignnone" width="639" caption="Removable lace modesty panel"]
 [/caption]
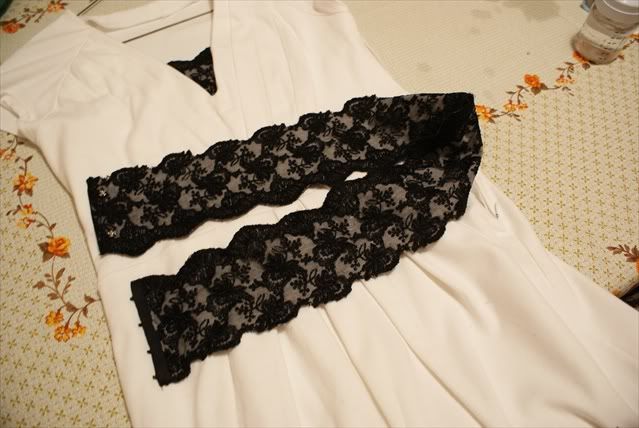
Here is a closeup of the lace belt, which is almost the favourite part of the dress for me. I wanted it to look like galoon lace, which I couldn't find at Spotlight, so I made do with what I had in my stash.
[caption id="" align="alignnone" width="639" caption="Lace belt"]
 [/caption]
The belt was the hardest to do, as this is the first time I've dealt with lace in this context. This was actually a small fat quarter piece of lace that was given to me with one scalloped border. I decided to cut it down along a motif, baste it to a white sew-in interfacing (to show off the black lace), and then backed again with black knit fusible interfacing. The edges have been finished with an overcasting stitch through all three layers.
Here is a parting shot.
[caption id="" align="alignnone" width="321" caption="Front view"]
 [/caption]
I really, REALLY like this dress, especially with the lace belt. Which one do you prefer?
 [/caption]
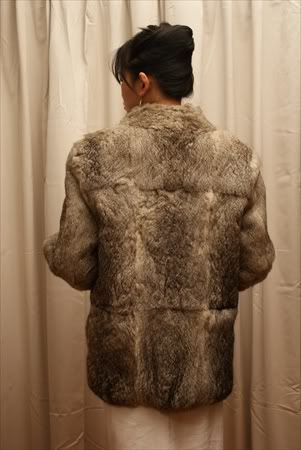 [/caption]
 [/caption]
 [/caption]
 [/caption]
 [/caption]
 [/caption]
 [/caption]
 [/caption]
 [/caption]
 [/caption]
 [/caption]
 [/caption]
 [/caption]
 [/caption]
 [/caption]
 [/caption]